
Giving Your Raspberry Pi a Brain: Installing an OS with Raspberry Pi Imager
A Raspberry Pi without an operating system is like a computer without a mind. It has the hardware, the ports, and the potential — but it doesn’t know what to do yet. To bring it to life, the first step is installing an OS (operating system).
Thankfully, you don’t need complicated tools or command-line wizardry to do this. One small app does almost all the work for you: Raspberry Pi Imager.
Let’s walk through how it works and why it makes setting up a Pi surprisingly easy.
What Is Raspberry Pi Imager?
Raspberry Pi Imager is an official tool from the Raspberry Pi Foundation that prepares your SD card with the operating system your Pi will run.
Instead of manually downloading OS files, formatting cards, and flashing images with third-party software, Imager combines everything into one simple workflow:
- Choose an operating system
- Choose your SD card
- Click Write
That’s it. The tool downloads the OS, installs it correctly, and makes the card ready to boot.
Why the SD Card Matters
Unlike most laptops, Raspberry Pi doesn’t store its main system on an internal drive. Instead, it boots from a microSD card, which acts as both:
- The system disk (where the OS lives)
- The storage for files and programs
This makes experimenting easy. Want to try a different OS?
Just flash another card. No risk to your main computer, no complex setup.
The SD card becomes your Pi’s entire personality.
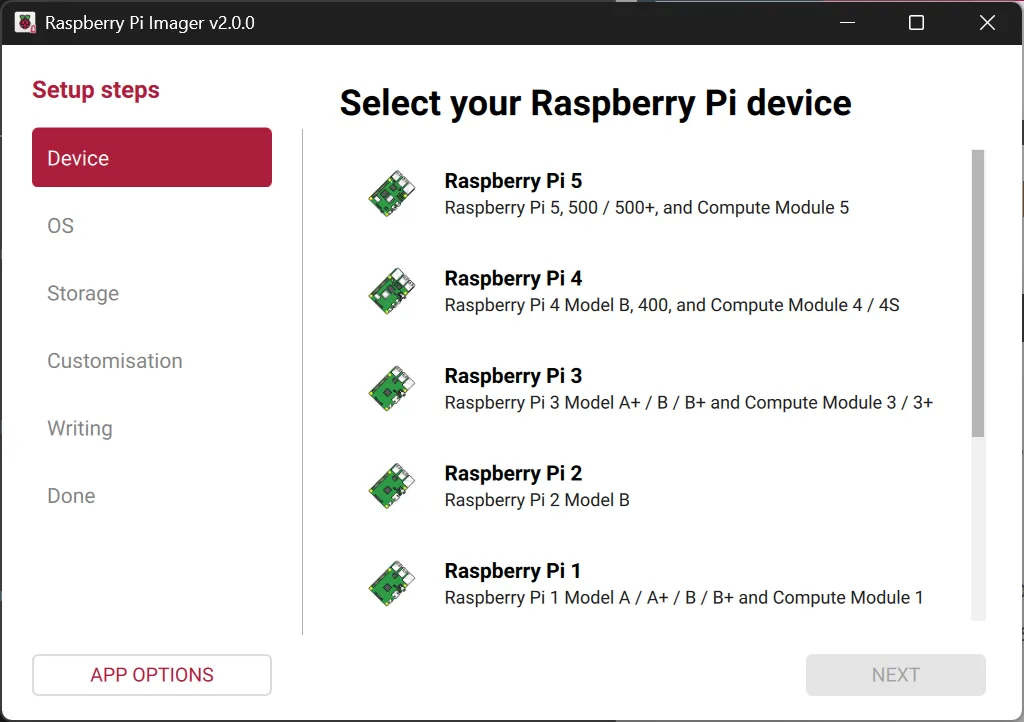
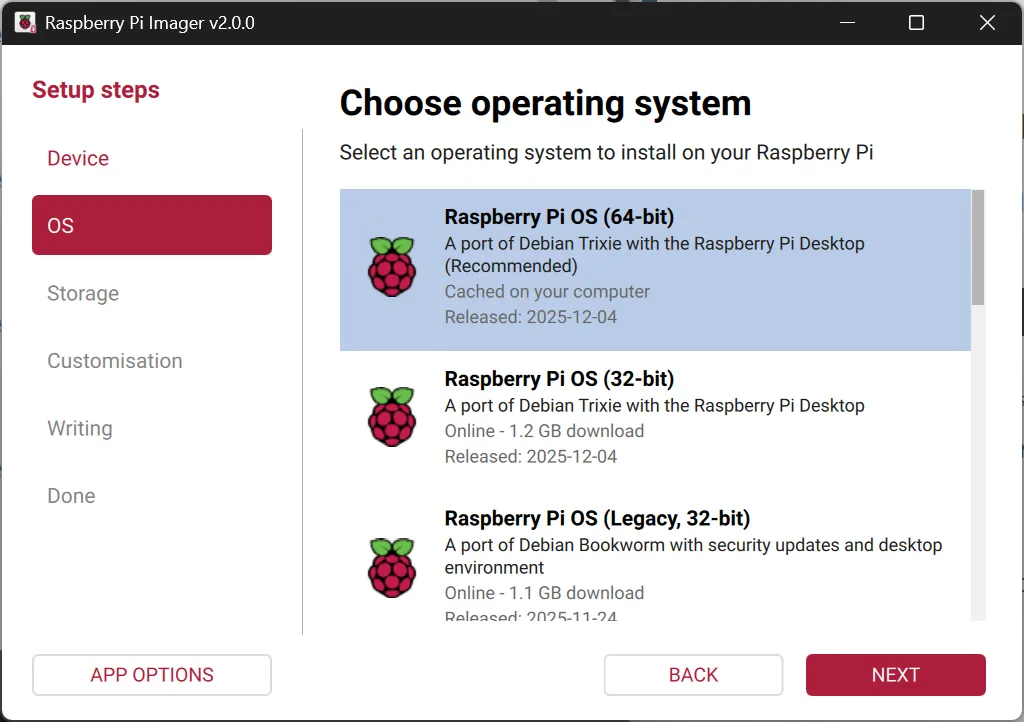
Choosing an Operating System
When you open Raspberry Pi Imager, you’ll see a list of operating systems you can install. These usually include:

- Raspberry Pi OS – the official, beginner-friendly choice
- Lightweight versions for low-memory projects
- Other Linux distributions like Ubuntu
- Specialized systems for media centers or retro gaming
Each OS is designed for different goals: learning Linux, building servers, running desktop apps, or turning your Pi into a dedicated device.
The Imager handles compatibility automatically, so you don’t have to worry about picking the wrong version for your board.
One Click, Many Things Happening
When you press Write, a lot happens behind the scenes:
- The OS image is downloaded (if needed)
- The SD card is completely erased
- The correct boot structure is created
- The system files are copied and verified
All of this used to require multiple tools and careful steps. Now it’s a progress bar and a short wait.
Once it’s done, your SD card is ready to turn into a tiny computer.
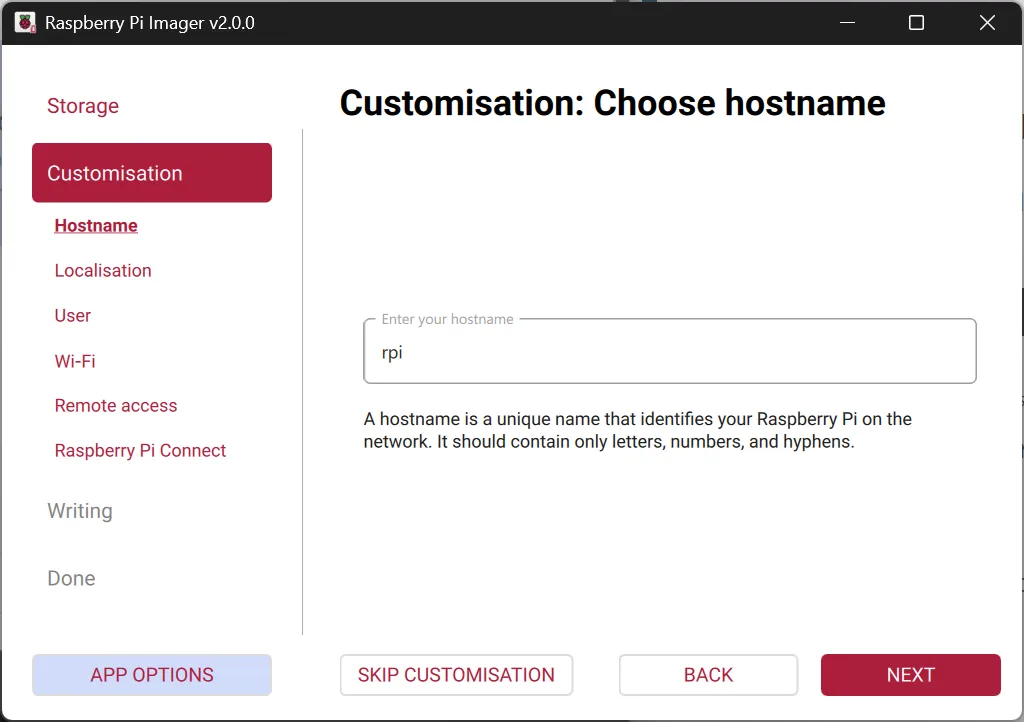
Advanced Settings (Without the Headache)
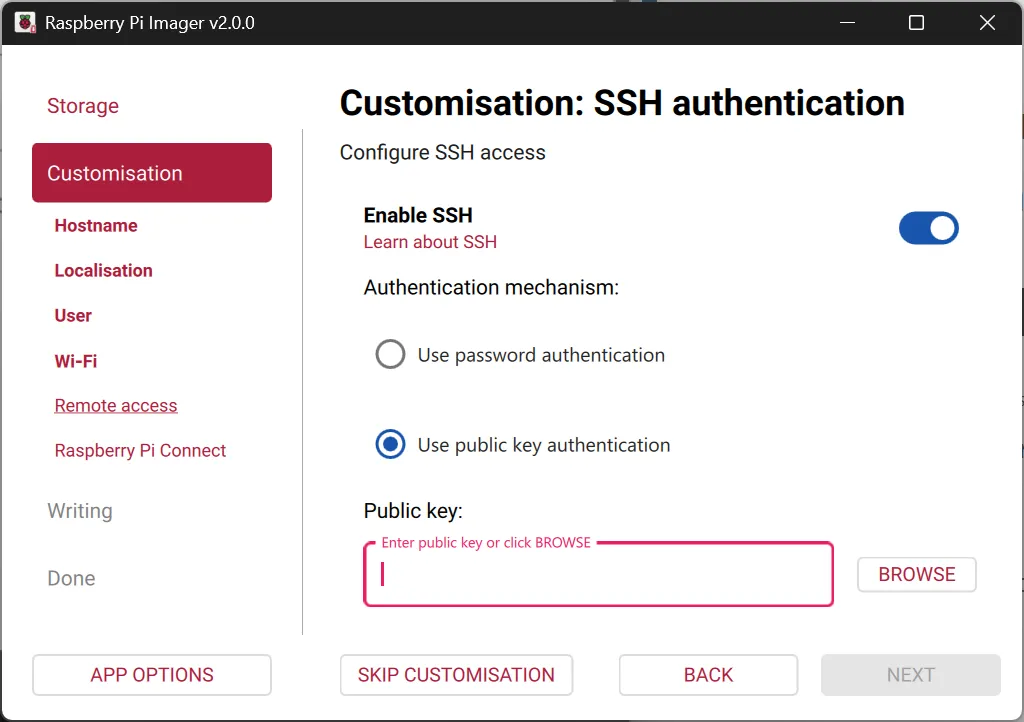
One of the most useful features of Raspberry Pi Imager is that you can pre-configure your system before the first boot.
In the settings menu, you can:
- Set a username and password
- Configure Wi-Fi
- Enable SSH for remote access
- Set your keyboard layout and timezone
This means you can prepare a Pi that’s ready to connect to your network and be controlled remotely, without ever plugging in a screen or keyboard.
For servers, robots, and headless projects, this is a huge time saver.
First Boot: When the Pi Comes Alive
After writing the card, you insert it into your Raspberry Pi, connect power, and… it starts.
On first boot, the system may:
- Resize the file system to use the full SD card
- Apply configuration settings
- Finish installing packages
After that, you’re officially running your own operating system on a device the size of a credit card.
It’s a small moment, but it feels surprisingly powerful.
Why This Is Such a Big Deal
Installing an OS used to be a technical barrier. It required:
- Disk imaging tools
- BIOS settings
- Manual driver installs
Raspberry Pi Imager removes almost all of that friction. It makes low-level computing accessible to:
- Students
- Hobbyists
- Makers
- Tinkerers who just want to experiment
This ease of setup is a big reason Raspberry Pi became such a popular platform for learning about Linux, hardware, networking, and embedded systems.
From Blank Board to Real Projects
Once your OS is installed, your Raspberry Pi can become almost anything:
- A tiny desktop computer
- A web server
- A smart home controller
- A game console
- A robotics brain
And if you want to try something new, you don’t have to wipe everything and start over — just flash another SD card and explore a different setup.
It turns hardware into something flexible and forgiving, which is perfect for learning.
Small Tool, Big First Step
Raspberry Pi Imager might look like a simple utility, but it’s the gateway to everything your Pi can become. It turns a blank piece of hardware into a programmable system in minutes, without complicated steps or specialized knowledge.
It’s not just about installing software.
It’s about lowering the barrier between curiosity and creation.
And once your Pi boots for the first time, you’re no longer just plugging in hardware — you’re building your own tiny computer from the ground up.